Introduction
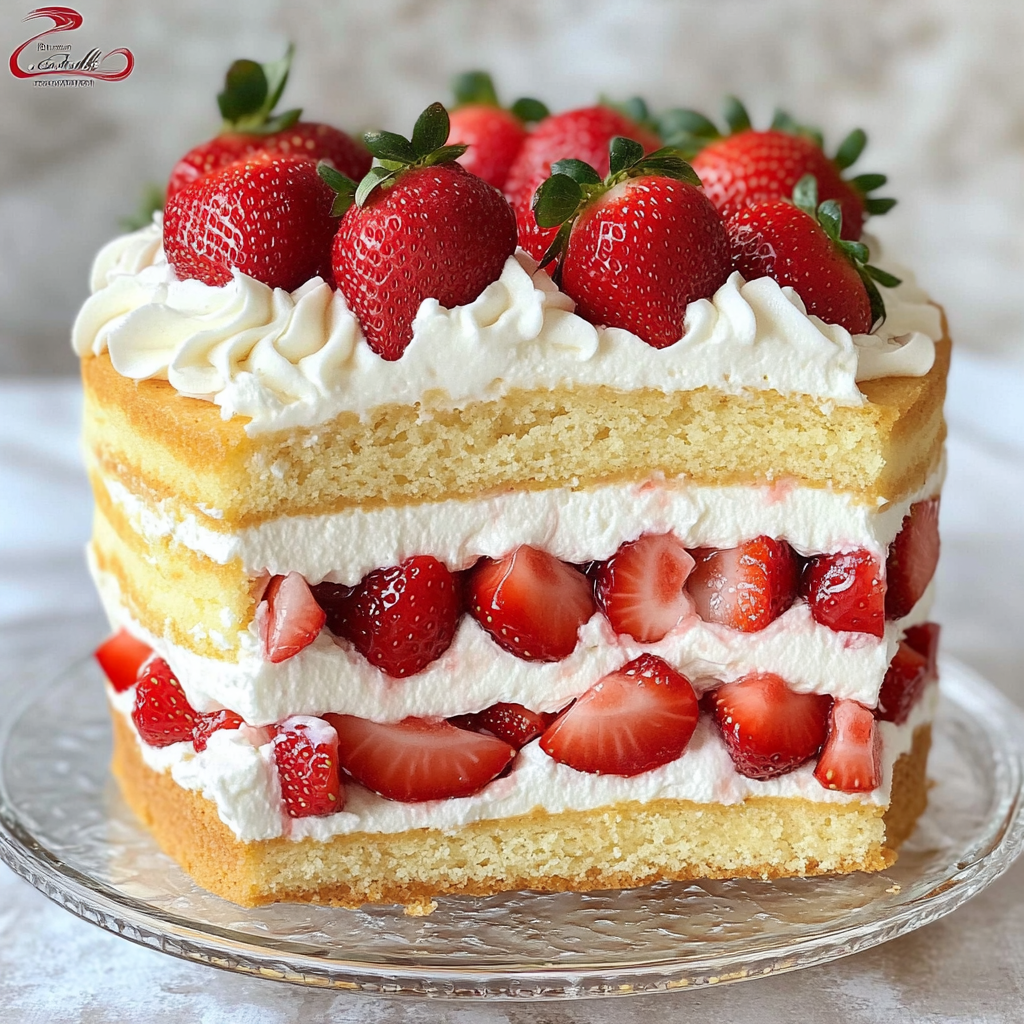
Strawberry Shortcake Cake is an adored dessert that effortlessly blends layers of fluffy vanilla cake rich whipped cream frosting as well as the fresh sweetness of strawberries. This simple yet elegant cake is great for any event that ranges from casual gatherings to elegant celebrations. In this tutorial we’ll go over every aspect of making your perfect shortcake strawberry. We’ll make sure that your cake is tasty and stunning in appearance.
Table of Contents
- What Makes Strawberry Shortcake Cake Special?
- Essential Ingredients for the Perfect Cake
- Step-by-Step Instructions for the Cake Base
- Crafting the Ideal Filling
- Whipped Cream Frosting: The Heart of the Cake
- Tips for Assembling Your Cake
- Creative Decoration Ideas
- Common Mistakes to Avoid
- Tips and tricks from top Pastry Chefs
- Frequently Asked Questions
1. What Makes Strawberry Shortcake Cake Special?
It is an expression the simplicity and taste. The mix of:
- Moist vanilla cake layers
- Fresh, juicy strawberries
- Rich frosting made of whipped cream creates a dessert which is both sweet and nostalgic. Contrary to overly sweet cakes the sweetness of strawberries is perfectly balanced with the richness of the frosting.
2. Essential Ingredients for the Perfect Cake
Cake:
- All-purpose Flour: for structure, and to fluffiness.
- Baking Powder: This powder gives you a smooth and airy texture.
- The sugar granulated It sweetens the taste and can help keep moisture in the body.
- Vegetable oils: Helps keep the cakes soft and moist, without imposing flavors.
- Eggs, egg yolks and whites Give stability and richness.
- The almond and vanilla extracts: Add depth to the flavor profile.
- Milk and sour cream: Keep the cake moist and tender.
Filling:
- Strawberry fresh: The star ingredient that adds a zing of freshness.
- Jam made from strawberries: It enhances sweetness of the strawberry.
Frosting:
- Cream cheese It adds structure and tanginess.
- Sugar powdered: Sugar that sweetens, without gritty.
- The heavy cream used to whip: Creates the light, fluffy texture necessary to make frosting.
3. Step-by-Step Instructions for the Cake Base
- Preheat and Prepare:
- Preheat your oven to 350°F.
- Line three cake pans of 8 inches with parchment paper, then grease them lightly.
- Mix Dry Ingredients:
- Within a large bowl mix in 2 cups of the flour and 3 teaspoons of baking soda, as well as 1 teaspoon salt. Set aside.
- Combine Wet Ingredients:
- Utilizing a stand or hand mixer, mix 1 3/4 cups of sugar and 1 cup vegetable oil to make it the mixture is smooth. Add two large eggs and two large egg whites one at one time, then add two and a half teaspoons of vanilla extract, and 1 teaspoon of almond extract.
- Incorporate Dry Ingredients:
- Gradually add the dry mix In addition, mix in 1/2 cup of milk, and 3/4 cup of sour cream. Mix until well blended, but be careful that you don’t overmix.
- Bake:
- Divide the batter equally between the pans that you have prepared. Baking for between 18 and 22 minutes until a toothpick placed into the middle is clean. The cakes should cool completely on the wire rack.
4. Crafting the Ideal Filling
- Prepare the Strawberries:
- Cut into pieces or chop 3 cups fresh strawberries.
- Mix 2 1/2 cups of the mixture with two tablespoons strawberry jam. Reserving 1/2 cup for garnishing.
- Enhance the Flavor:
- Allow the mixture to sit for about 15 minutes in order to allow the flavors to mix.
5. Whipped Cream Frosting: The Heart of the Cake
- Cream Base:
- Beat 8 ounces softened cream cheese, 1 cup powdered sugar, and 1/4 teaspoon vanilla extract to make it it is smooth.
- Whip the Cream:
- In stages, add two 1/4 cup of heavy whipping cream. Whip at a high rate until stiff peaks appear. Keep the cream chilled for the best results.
6. Tips for Assembling Your Cake
- Layering:
- Begin with a cake layer, then spread a large amount of frosting and cover with 1 1/4 cups of strawberry filling.
- Repeat for the next layer.
- Finishing Touch:
- For the top layer distribute the remaining frosting evenly, and then place the reserved strawberries cut into dices in the middle. You can also garnish the top layer with fresh strawberries.
7. Creative Decoration Ideas
- Rustic Look:
- Spread the frosting out in the form of peaks and swoops for an authentic look.
- Elegant Design:
- Make use of a piping bag that has the star tip to make attractive edges.
- Seasonal Touch:
- Use fresh flowers, like mint leaves or edible ones to add an extra splash of colour.
8. Common Mistakes to Avoid
- Mixing batter too much This results in thick cake layers.
- Utilizing warm cream: It stops the frosting from properly thickening.
- The use of parchment paper instead increases the chance of sticking.
9. Expert Tips from Top Pastry Chefs
- Maintain freshness: Use peak-season strawberries to get the most taste.
- chill between each step: The cake layer and the frosting can be chilled. This make the assembly process much easier.
- Adjust sweetness to balance: You can adjust the sugar powder used in the frosting according to your liking.

10. Frequently Asked Questions
Q Do I have the ability to make this cake in advance? A: Yes cakes can be made ahead of time ahead of time and frozen for up to one month. Make the cake that day you are serving.
Q What if I used frozen strawberry? A: Fresh strawberries are great, however, frozen ones can be used as long as they are the strawberries are thoroughly thawed, then drained.
Question: What can I keep the leftovers? A: Store the cake in an airtight container within the refrigerator for 3 days.
A: Is this recipe gluten free? A: Substitute the all-purpose flour for the gluten-free blend of flour.
What is HTML0? Q: How can I get even cake layers? A: Weigh the batter for each cake pan to ensure that the batter is consistent.
Conclusion
The strawberry shortcake is an iconic dessert that will bring joy to tables. With this tutorial to make cakes that not just looks amazing but also tastes fantastic. When you bake for a gathering with family or for a special occasion the cake is sure to delight. Be a part of the process, and revel in the joy of creating a dessert equally beautiful and delicious!